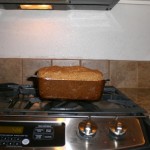
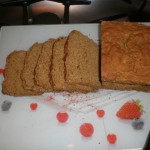
 We are a bread centered country. For breakfast we eat toast, for lunch we eat sandwiches and with dinner we have dinner rolls, pizza or French bread. It’s ridiculous how dependent on bread we are! So when needing to go gluten free, what are you to do? Add to that the complications of needing to be dairy free and egg free and things get really gnarly! What is worse is all of the other food sensitivities to different grains that are popping up, which makes buying commercial gluten free bread downright impossible and usually, frustratingly non-tasty!
With all of the food allergies and sensitivities that abound, making a purely allergen free bread is nearly impossible. For all the people that have a sensitivity to rice, an equal number can’t do quinoa or buckwheat or coconut (heaven forbid). This makes personal experimentation key. And yes… kitchen disasters inevitable, but who cares? So, what you make isn’t perfect or the desired holy grail of bready slicing goodness. Make tweaks, make changes and try again… and again… and again. Learn to relish experimentation, learn to seek out the right texture, learn to anticipate the changes in humidity and how that will affect your bread’s rising. Every mistake is a learning opportunity–in life and in bread making.
This bread was my favorite for a time–gluten free, vegan and tasty. I’m on to new experiments, but I share this one as a starting point for you to create your own allergen-free masterpiece. I dedicate this bread to Joanne Thompson, owner of Yoga For Self in Denver, who is starting her own gluten free bread odyssey.
May your yeast rise, your flours bind and your digestion be calm, strong and a beacon of energy and life force… Cheers!
 I list a grip of substitutions, but realize they all taste and behave differently and there are certainly other substitutions that you can make based on your allergies, sensitivities, available ingredients, etc. Be a mad scientist. Enjoy the challenge.
Ingredients
Dry:
1 cup potato starch (not flour) or tapioca starch (yes, for you, Leslie!)
1/2 cup quinoa flour (or millet)
1 cup sorghum flour (or brown rice flour, teff, almond meal, or combination thereof)
2 teaspoons xanthan gum (or guar gum)
1-2 tsp full mineral sea salt
2 1/4 teaspoons dry yeast
Wet:
1 1/4 cup warm water (~115 degrees F or for all you mommas out there… do the hot bottled milk test on the inside of your wrist)
3 tablespoons oil (coconut or olive oil if you aren’t afraid of heating it, or somethin’ else)
1 tablespoon sweetener (I like honey, because it helps with texture)
1/2 teaspoon vinegar, lemon or lime juice
1 egg or (1TB Ener-G Egg Replacer, chia seeds, flax seeds or arrowroot powder whisked with 4TB warm water till frothy). If you don’t do the egg or the Ener-G Egg Replacer (which has some funky ingredients), you might want to add 1tsp baking powder to help with leavening
Decoration:
Handful of sesame, sunflower and/or pumpkin seeds for decorating
Directions
Whisk together all liquid ingredients with the yeast and allow to sit and get frothy as the yeast starts consuming in gluttony (not glutinous gluttony mind you).
In a food processor, blend all dry ingredients until entirely combined. Add frothy liquid ingredients into food processor as it is running. Add more warm water, as needed to reach muffin batter type consistency. This batter will be more liquid and sticky than what you are used to with glutinous bread batter. This batter will not ball up like glutinous bread batter, as more liquid is being used. If it does ball up, add more warm water. Food process until completely blended.
Grease your bread pan. Sprinkle seeds on the greased pan (bottom and sides) if desired. Pour in batter. Smooth it down. Sprinkle seeds on top (if desired). Put in warm location and let rise for at least 20 minutes.
I think you could certainly do this recipe in a breadmaker, but a food processor and a bread pan is so, so, so easy… why bother? Plus, depending on the size of your food processor, you can do 2-3 loafs at once.
Bake at 350 degrees at 1 hour. Cool 5 minutes or so, remove from pan and either put on wire rack to completely cool or I recommend returning the loaf to the oven, flipped over without a pan, and baking for another 10 minutes or so to make a more crusty loaf. I know it’s hard, but try, really try to cool the loaf completely before slicing. You’ll find the texture to be much less gooey when cooled first.
If after cooling, your texture is still gooey, omit or decrease chia/flax seeds, decrease or omit honey or agave, or decrease oil. Store in fridge. If you aren’t going to eat the loaf within a few days, store sliced bread in freezer.
If you are interested in learning to cook without recipes and honing your creativity in the kitchen, please join me in Denver for one or more of my cooking classes.

Thank you, Katie. This is just perfect. I’ve never had a bread recipe dedicated to me and can’t wait to experiment. What fun! Joanne
Oh good! Make sure to post how your experiments turn out–what works, what doesn’t, what you like, what you don’t like. Fascinating stuff! I think it is so much fun experimenting with different flours, oils, seasonings and uses. Have fun and keep us updated!
HI Katie – I tried out the recipe and was pretty pleased with the results. The bread fell on one side a couple of minutes after I took it out of the oven. What did I do wrong? I used potato starch, quinoa flour, brown rice flour and sorghum flour, xanthan gum, salt and yeast for the dry ingredients and sunflower oil, honey, lemon and an egg for the wet ingredients. I put the yeast in with the wet ingredients although the recipe didn’t say to do that.
Thanks for your suggestions and advice! Joanne
Hey Joanne, I’m so glad you tried the recipe! Sounds like a great combination of ingredients. You were right to add the yeast to the wet ingredients that way the yeast can start consuming the sugars and get frothy and ready. I made that more clear in the recipe–thanks.
Since you used an egg, your only liquid should have been the 1 1/4 C water (the added 4 TB of water is only when using an egg replacer). Usually when breads fall it is because there is too much liquid. If you did add the extra 4 TB of water, omit that and you should be good to go. Different flours require different amounts of liquid. If the 1 1/4 C water was your only liquid try another run using the same flours and 1 egg, but dropping the water to 1 1/8 cup. Also, try adding an additional 10 minutes to your cooking time. Humidity in the air, altitude and types of flour can all affect rising (and falling), amount of liquids needed and cooking time. Let us know how it goes!
Thanks, Katie. the 1 1/4 C water was my only liquid so I’ll reduce it and try again. I’ll keep you posted…